Add Nodes
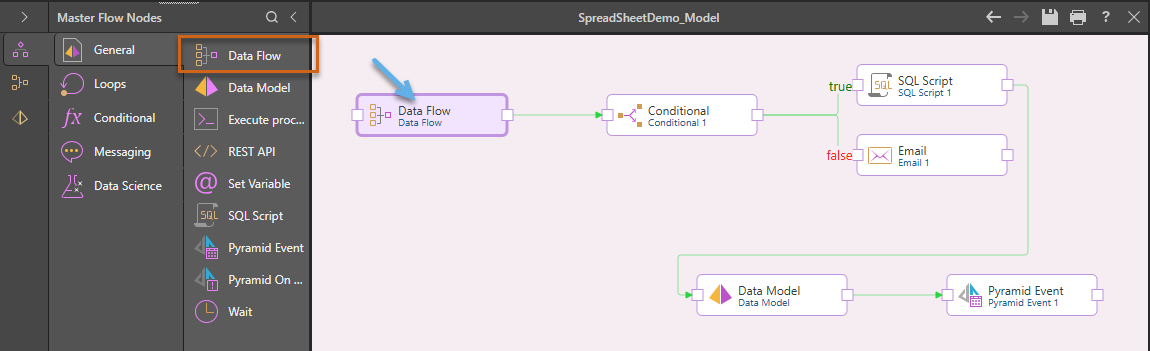
Find the required node and drag it onto the canvas. Continue this process, and add connections between the nodes in the order you want them to be executed.
To add nodes to a loop, simply drop them onto the loop container.
Connecting Nodes
Create Connections
To add a connection between nodes, hover over the node that should precede the target node in the sequence; drag a link out from the node's outgoing link point. The incoming link points of the other nodes will be highlighted in green; drop the link onto the incoming link point of the relevant node.
Edit Connections
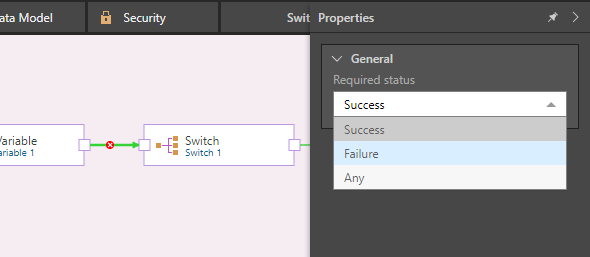
To edit a connection, click on it to open its Properties panel. The required status is set to 'Success' by default, but it can be changed to 'Failure' or 'Any'.
The Conditional and Switch nodes expose additional connection options.
Delete Connections
Hover over a link to display its X icon. Click X to delete the link.
Deleting Nodes
To delete a node, select it and then either click Delete from the ribbon or the right-click context menu:
Node Properties
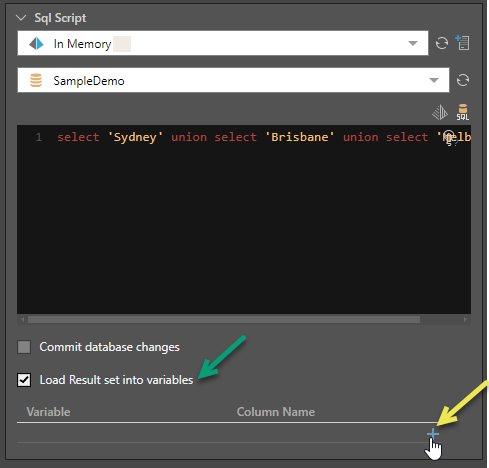
Each node has its own properties that must be configured from the Properties panel. For details about the properties of any particular node, refer to the article for that node. For example, the following Properties panel is shown when the SQL Script node is selected on the canvas; you can view details about the SQL Script node at SQL Script.
Execute the Master Flow
You can execute the master flow at a number of levels; executing the entire flow, executing a single node, or executing a node and all subsequent nodes in a master flow.
Executing the entire flow
To execute the entire flow:
- Click Run at the top-left of the interface (purple arrow below) or press F2 on your keyboard.
- Select the Reporting Action you require:
- Select the processing options to apply:
- Override Security: Override the metadata security set from the Admin Console or the Materialized Manager. Disable if metadata security should not be affected by processing the data model. Click here to learn more.
- Process Models Only: Only process the models. Do not process the Data Flow or Master Flow.
- Auto Sync Models: Synchronize the columns in the Data Model with the columns in the Data Flow; this is important where changes were made from the Data Flow.
- Validate Model Relationships: Check that the join definitions between tables are valid. The validation process may impact model processing time, so, although the validation is enabled by default, it can be turned off if needed.
- Click the purple Master Flow button to execute the flow.

The Processing Options dialog opens.
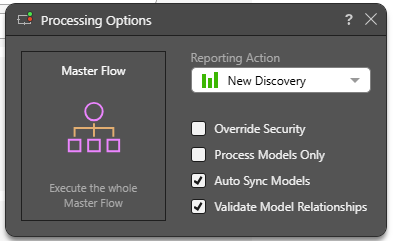
Choose which module the new data model should be opened in: Discover, Smart Discover, Smart Publish, or Smart Present. The data model opens in the given reporting tool as soon as processing is complete. If you don't want any reporting tool to open automatically, select None.
If you haven't already saved the model definition file, you will be prompted to save before processing begins.
Executing individual nodes
You can execute an individual node or particular flow within your master flow to save time or target particular changes.
To execute an individual node or a flow from a particular node:
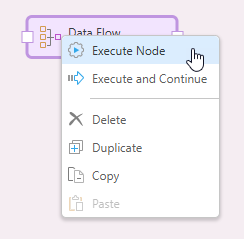
- Select a single node and right-click Execute Node on the context menu.
- Select a single node and right-click Execute and Continue to execute the selected node and then each of the nodes that follow it in the Master Flow.
If you haven't already saved the model definition file, you will be prompted to save before processing begins.
Example: Execute and Continue
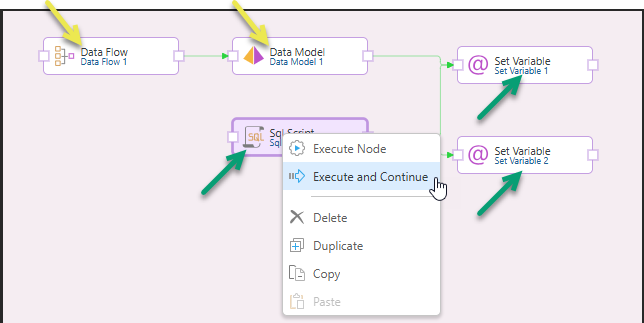
Selecting the SQL Script node in the following example master flow and right-clicking Execute and Continue executes this selected node SQL Script and the nodes that follow it in the master flow: Set Variable 1 and Set Variable 2.
The nodes that are executed in response to this action are shown with green arrows in the following image. The nodes that are not executed are shown with yellow arrows: